WATCHOUT multi-display software is your fast track to creating spectacular shows. Use WATCHOUT to compose and manage all the different media elements in your show – video, still images, animations, graphics, live feeds, sound – and then play it back on multiple displays. Perfectly synchronized, high resolution and right-on-cue.
WATCHOUT is easily integrated and controls external units or devices. It has no limitations on displays, channels or resolutions. With over 15 years of unrivalled performance and reliability, WATCHOUT is the choice of professional show creators worldwide.
WATCHOUT is used in live events, 3D mapping, broadcast, digital signage, museums, planetariums, show rooms, visitor attractions and experience centers. In other words – virtually any market or application where you want multiple display devices and maximum impact.
Resolume Arena is VJ (Visual Jockey) software that combines music and video for real-time space production and delivers music videos in real time.
With a wealth of features for power users, Arena can build a high standard of visual performance from scratch, regardless of stage. It is used in a variety of live performances around the world, including local clubs and discos, concert venues, large festivals, and arena-class live concerts.
Resolume Arena Main features of
・Full Japanese support and tutorial Support and tutorials can be confirmed in Japanese
・Live video mixing Intuitive interface lets you combine visuals quickly and easily and adjust forward, backward, scratch, and tempo to beat
・Audio-visual playback Possible to combine audio and video and analyze voice
・Supports multiple (arbitrary number) screens The screen size and the number of outputs depend on the performance and specifications of the computer or graphic card used.
·projection mapping Allows projection onto any type of surface throughout the building (walls, ceilings, etc.)
・LED and visual synchronization Color can be sent to DMX fixtures, LED and visual can be synchronized
・Real-time rendering Applying live compositing function and effects enables high-speed performance and maximum image quality
・All hands on deck Operation and control using iPhone, DMX via MIDI controller or OSC
The MA onPC command wing paves the way for mobile use of the highly flexible and powerful grandMA2 control system. In combination with the free of charge grandMA2 onPC software, the MA onPC command wing is a portable 2,048 parameter control solution that can be used in nearly any location – and all for an affordable price! It offers two built-in DMX ports as well as the possibilty to send two additional DMX universes via Ethernet protocols with grandMA2 onPC.
Designed as the perfect hardware expansion to the grandMA2 onPC software, the MA onPC command wing enables the look and feel of the software to be as close to a real grandMA2 console as possible. Thanks to the MA onPC command wing – incorporating the command section of the grandMA2 consoles – it has never been easier to use the grandMA2 onPC software. With a simple USB connection between the MA onPC command wing and the computer running the grandMA2 onPC software, all inputs and outputs of a grandMA2 console are available to the user. DMX, Midi, Timecode and Analogue Remote are all on hand directly at the MA onPC command wing. As a clever detail a slot for a Kensington lock is integrated.
Wherever it is physically difficult to use a grandMA2 console, the MA onPC command wing, in conjunction with the grandMA2 onPC software, enables the customer to program or playback within the grandMA2 world. Therefore the MA onPC command wing is ideal to be used as a backup solution within the grandMA2 system, as powerful control solution on the road or for smaller theatres, shows and clubs or for preprogramming.
It is also possible to add more faders by connecting the MA onPC fader wing to the MA onPC command wing. Moreover the MA onPC fader wing provides additional 2,048 parameters and four DMX lines. The MA 8Port Node onPC and MA 4Port Node onPC will add 2,048 parameters and eight or four DMX lines respectively.
Please regard that it is possible to connect one MA onPC command wing and up to two MA onPC fader wing together to a computer running grandMA2 onPC.
Features
Real-time control for 2,048 parameters in combination with grandMA2 onPC (up to 65,536 parameters as backup in the MA system)
Expandable up to 4,096 parameter
Command section similar to grandMA2 layout
2 A/B faders (100mm)
1 Level-Wheel
Individually backlit and dimmable silent (clickless) keys
Integrated universal power supply
Light, handy & rock solid
Ergonomic design
Just connect via USB to any PC running grandMA2 onPC
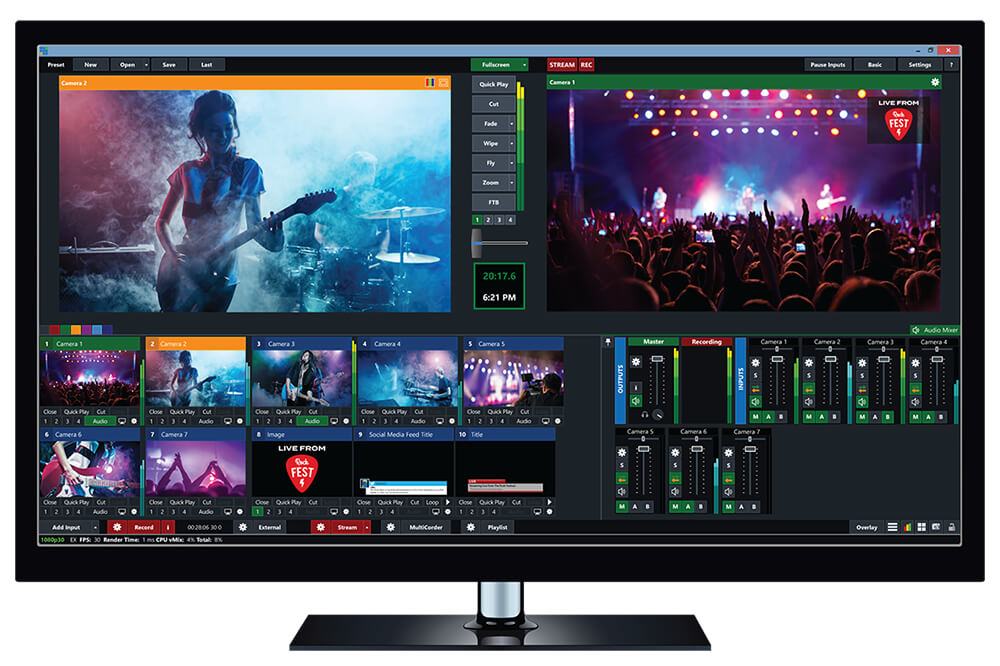
vMix is a Software Video Mixer and Switcher that utilises the latest advances in computer hardware to provide live HD video mixing, a task previously only possible on expensive dedicated hardware mixers.
vMix also functions as live streaming software that allows you to publish your live productions directly to the Internet!.
vMix runs on the Windows 10 platform.
vMix is a complete live video production software solution with features including LIVE mixing, switching, recording and LIVE streaming of SD, full HD and 4K video sources including cameras, video files, DVDs, images, Powerpoint and much much more.
As vMix is a software solution, we’ve enabled users to build their own custom computers at a fraction of the cost of traditional live production equipment. We have created vMix Reference Systems that will allow you to build a vMix PC with specifications to match your production needs. We also have a list of available system builders that can create a system for you!
Whether you are looking to produce big budget live concert productions, sporting events, Church services or small webcasts, then vMix is for you. Check out our Solutions page to see how vMix can fit into your workflow.
For a full list of what is possible with vMix view our features page.
So you decided to make 3d model, but don’t know where to start? In this article I will share my own 3d modeling workflow, which covers all stages, from idea to production ready model.
Idea
First of all, you need to know what kind of object do you want to make. Sometimes you already have a vision, sometimes you need to create a specified model for a client. But if you don’t know what to do, then try to brainstorm new ideas and select the best one.
References
You need to collect a bunch of photos with a similar object to get a clear vision of different parts for your model. It’s also a good idea to watch works from other artists on websites, like Artstation or Sketchfab. You can make a concept art or simple sketches of the future model if you’re making a model of non-real things.
Planning
In this stage, you need to make a plan on how you can make your model. Each model could be split into separate simple primitives. Your goal is to imagine how you can create a complex model from simple pieces.
Block out
Now you need to add some basic primitives into your scene. Your goal is to create base shape of your future model. Be sure that size and proportions of your model are correct. Split your model into different pieces and start working on each one separately.
Refine low poly model
If you decided to make a high poly model from low poly by adding bevel and smooth, then you probably need to add additional details into your low poly to make it look better. You should keep your model with lowest possible polygon count, but quite enough to make good bake from your high poly model.
Retopology
You can also make a high poly model first, and add so many details as you want. You can use sculpting techniques or use some standard hard-surface modeling tools. When your model is ready, you need to build your low poly model from high poly by using retopology tools. It’s your decision what to do first: low poly or high poly. But keep in mind, that you can add additional details to your model in 3D painting software, like Substance Painter. So there is no need to add so many details in your high poly model in 3d modeling software, because you can add them later with alpha masks, quick and easy.
UV mapping
You need to unwrap your model by using UV editor so you can put 2D texture onto it. Sometimes you need to do this manually, sometimes automatic method is work well. Try to learn existing tools in your 3d modeling software, so you can speed up your work.
Rigging
In this stage, you need to build a skeleton for your model and add control elements to simplify animation process. Key terminology to learn: joints, driven keys, blend shapes, inverse and forward kinematics, control curves, constraints, deformers.
Skinning
After rigging, you need to bind your rig to your 3d model. Then you can move the joints or control elements and the mesh will follow them. You also need to paint weights to setup how much influence each joint should have over each vertex of your model.
Animation
When you’re done with rigging and skinning, you can start making animations for your model. You can make key-driven animation, or use motion capture data to make your model alive.
LODs
To achieve good performance in your games, you should keep polygon count for your model as low as possible. You can make different models for a different level of distance. And when your model is far from the player, you can show extremely low poly version(for example billboard for tree). When a player is near, you can show high poly version. You can make LOD variations by using different tools and modifiers in your 3d modeling software. Or you can use plugins inside the game engine(like symplygon or instaLOD), so they will produce LODs automatically.
Baking
Now you should bake different maps, like normal, ambient occlusion or thickness, to add details from high poly model to your low poly mesh. You can use different software for that, for example, XNormals(which is free). Also, Substance Painter has pretty good bakers, which works well even without a cage. If you’re planning to texture your model in SP, then it would be better to bake your maps in it.
Texturing
After baking you should create textures for your model. You can use different software, like Substance Painter or Desinger, Quixel Suite, Mari or Photoshop, for that.
Import
You can import your model into 3D renderer or game engine, even if you don’t have textures and animations. It depends on what you need. It will be better to import your model as soon as possible and then update it later when you add new details.
Make materials
You need to set up materials for your model in 3D renderer or game engine. So it’s time to import your textures, add additional effects to your material and make some test renderers. You can also skip texturing stage and add existing materials to your model if you have them(for example brick material to your wall model).
Lighting
You can bake lightmaps if you don’t plan to use dynamic lighting with your model. You can also add additional sources of light and bind them to your model.
Programming
If it’s a game model, then you probably need to write some code to make your model alive: add AI controller, animation controller, etc.
Conclusion
That’s all main stages of 3d modeling workflow. Of course not all of this steps are necessary for each model. I hope this list of steps will be helpful for newcomers, so they can dive deeper into each one later.
Resolume Arena is VJ (Visual Jockey) software that combines music and video for real-time space production and delivers music videos in real time. With a wealth of features for power users, Arena can build a high standard of visual performance from scratch, regardless of stage.
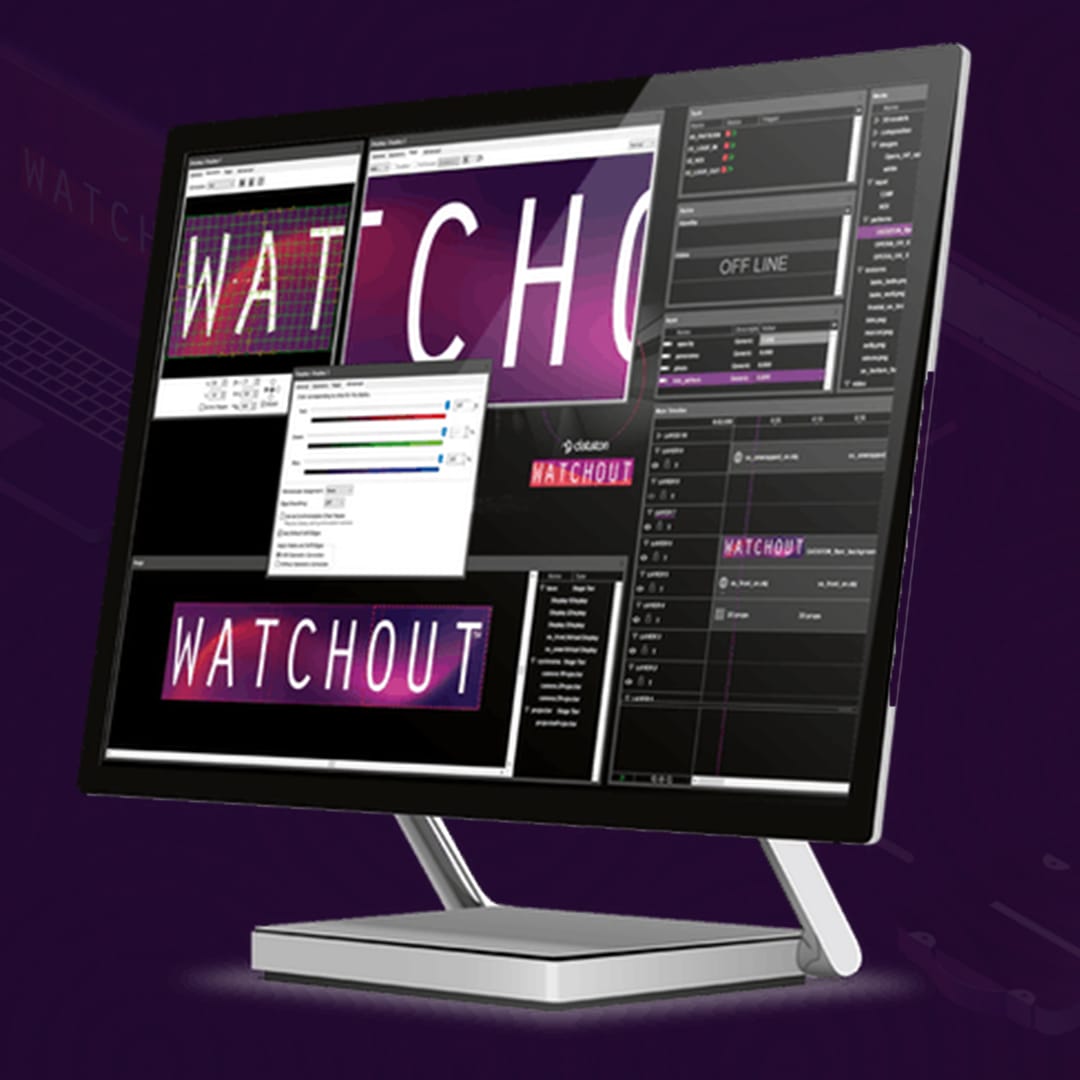
WATCHOUT multi-display software is your fast track to creating spectacular shows. Use WATCHOUT to compose and manage all the different media elements in your show – video, still images, animations, graphics, live feeds, sound – and then play it back on multiple displays. Perfectly synchronized, high resolution and right-on-cue.
WATCHOUT is easily integrated and controls external units or devices. It has no limitations on displays, channels or resolutions. With over 15 years of unrivalled performance and reliability, WATCHOUT is the choice of professional show creators worldwide.
WATCHOUT is used in live events, 3D mapping, broadcast, digital signage, museums, planetariums, show rooms, visitor attractions and experience centers. In other words – virtually any market or application where you want multiple display devices and maximum impact.
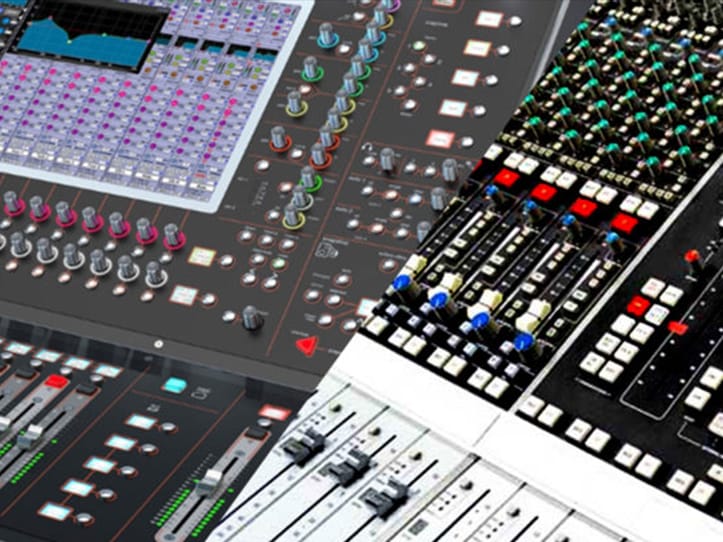
In sound recording and reproduction, and sound reinforcement systems, a mixing console is an electronic device for combining sounds of many different audio signals. Inputs to the console include microphones being used by singers and for picking up acoustic instruments, signals from electric or electronic instruments, or recorded music. Depending on the type, a mixer is able to control analog or digital signals. The modified signals are summed to produce the combined output signals, which can then be broadcast, amplified through a sound reinforcement system or recorded.
Mixing consoles are used in many applications, including recording studios, public address systems, sound reinforcement systems, nightclubs, broadcasting, television, and filmpost-production. A typical, simple application combines signals from microphones on stage into an amplifier that drives one set of loudspeakers for the audience. A DJ mixermay have only two channels, for mixing two record players. A coffeehouse‘s tiny stage might only have a six channel mixer, enough for two singer-guitarists and a percussionist. A nightclub stage’s mixer for rock music shows may have 24 channels for mixing the signals from a rhythm section, lead guitar and several vocalists. A mixing console in a professional recording studio may have as many as 96 channels.[1]
In practice, mixers do more than simply mix signals. They can provide phantom power for condenser microphones; pan control, which changes a sound’s apparent position in the stereo soundfield; filteringand equalization, which enables sound engineers to boost or cut selected frequencies to improve the sound; dynamic range compression, which allows engineers to increase the overall gain of the system or channel without exceeding the dynamic limits of the system; routing facilities, to send the signal from the mixer to another device, such as a sound recording system or a control room; and monitoring facilities, whereby one of a number of sources can be routed to loudspeakers or headphones for listening, often without affecting the mixer’s main output.[2]Some mixers have onboard electronic effects, such as reverb. Some mixers intended for small venue live performance applications may include an integrated power amplifier.
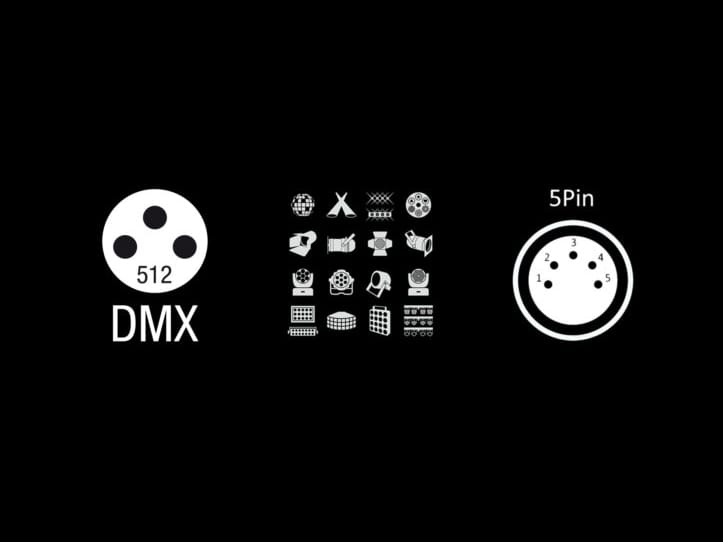
DMX 512 मा एउटा XLR आउपुट बाट 32 वटा सम्म मात्र Link गर्न सकिन्छ । त्यो भन्दा बढी गरेमा signal loss हुने, control नहुने इत्यादी हुन सक्छ । त्यसमा पनी cable को quality 100% copper छ भने मात्र 32 वटा Link गर्न हुन्छ नत्र भने बिभिन्न समस्याहरू आउन सक्छ ।
DMX 512 मा एउटा XLR आउपुट बाट 32 वटा सम्म मात्र Link गर्न सकिन्छ । त्यो भन्दा बढी गरेमा signal loss हुने, control नहुने इत्यादी हुन सक्छ । त्यसमा पनी cable को quality राम्राे छ भने मात्र 32 वटा Link गर्न हुन्छ नत्र भने बिभिन्न समस्याहरू आउन सक्छ ।
Stage lighting is the craft of lighting as it applies to the production of theater, dance, opera, and other performance arts. … In addition to basic lighting, modern stage lighting can also include special effects, such as lasers and fog machines.
Let's Work Together
Contact us today for any of your project needs, or for any other general enquiries drop us a line. We’d love to hear from you.